Showing posts with label moderate difficulty. Show all posts

Friday, July 23, 2010

kimchi

if you follow my blog at all, you probably know i'm a cabbage junkie.  i eat the stuff by the bowlful.  last year i bought a airlock fermenter so i can make my own gallon jars of homemade kraut.  the best part - lots of extra cabbage (i always overestimate). so i put my overstock to good use, and decided to make up a batch of vegan kimchi (most recipes have some sort of fish sauce). let me preface this by saying i don't know how authentically korean this recipe is, but it makes the kimchi flavor i like, so i'm sticking with it.  the one thing i don't add is sugar, which a lot of recipes call for. but again, if you read my blog, you know that sugar and i are like oil and water - we just weren't meant to go together.  i've included pics at the bottom that document the process of making this deliciousness.


  • 1 head of napa cabbage
  • 2 baby bok choy
  • 1 carrot, shredded
  • other veggies: green peppers, daikon, scallions
  • 1¼ tablespoons kosher salt
  • 3 cups water

for the kimchi paste:
  • 1/4 cup + 1 tablespoon korean chili powder
  • 4 cloves garlic, minced
  • 2 cloves ginger, minced
  • 3 tablespoons water

start by prepping the cabbage.  cut a small v into the thick part of the stem and remove.  then cut it crosswise (see picture below).  put cabbage in sterile bowl, and toss with about 1¼ tablespoons of kosher salt.  next, cut up the bok choy, and mix in with the cabbage. add the water and let sit at room temperature for about a hour or two. in the meantime, mince and slice the other veggies. after cabbage has tenderized in the brine, drain and rinse the cabbage off several times and taste a small piece.  if it's too salty, submerge cabbage in water without salt and let sit for 15 or 20 minutes to desalt and then drain.  it's sort of a balance that you will figure out after a couple times making it.

in a separate bowl, mix up all the paste ingredients except for the sesame seeds.  put all the veggies in the bowl with the cabbage and mix in paste.  you can do it by hand by using gloves, or i just use a large sterile plastic mixing spoon.  make sure all the cabbage is coated, and then toss in the sesame seeds and mix them in.  in a sterile quart jar, start packing the kimchi in, making sure to press down and push out any air.  once the kimchi is packed in, pour in the remaining kimchi brine that was generated by mixing the paste. make sure the cabbage completely covered with slurry.


at this point, you can eat it, pop it in the fridge or let it ferment (more traditional).  to ferment, make sure all cabbage is covered with slurry (but not completely to the top), cap it, and put in a cool dark place (slightly below room temperature) for a few days before moving to fridge.  if needed, you can fill a ziploc bag with water and set it on top to submerge the veggies before you cap it.  i've done both, but fermented foods certainly have some benefits.  eat with noodles, rice, dumplings, in soups, in nori rolls, as a side, etc.
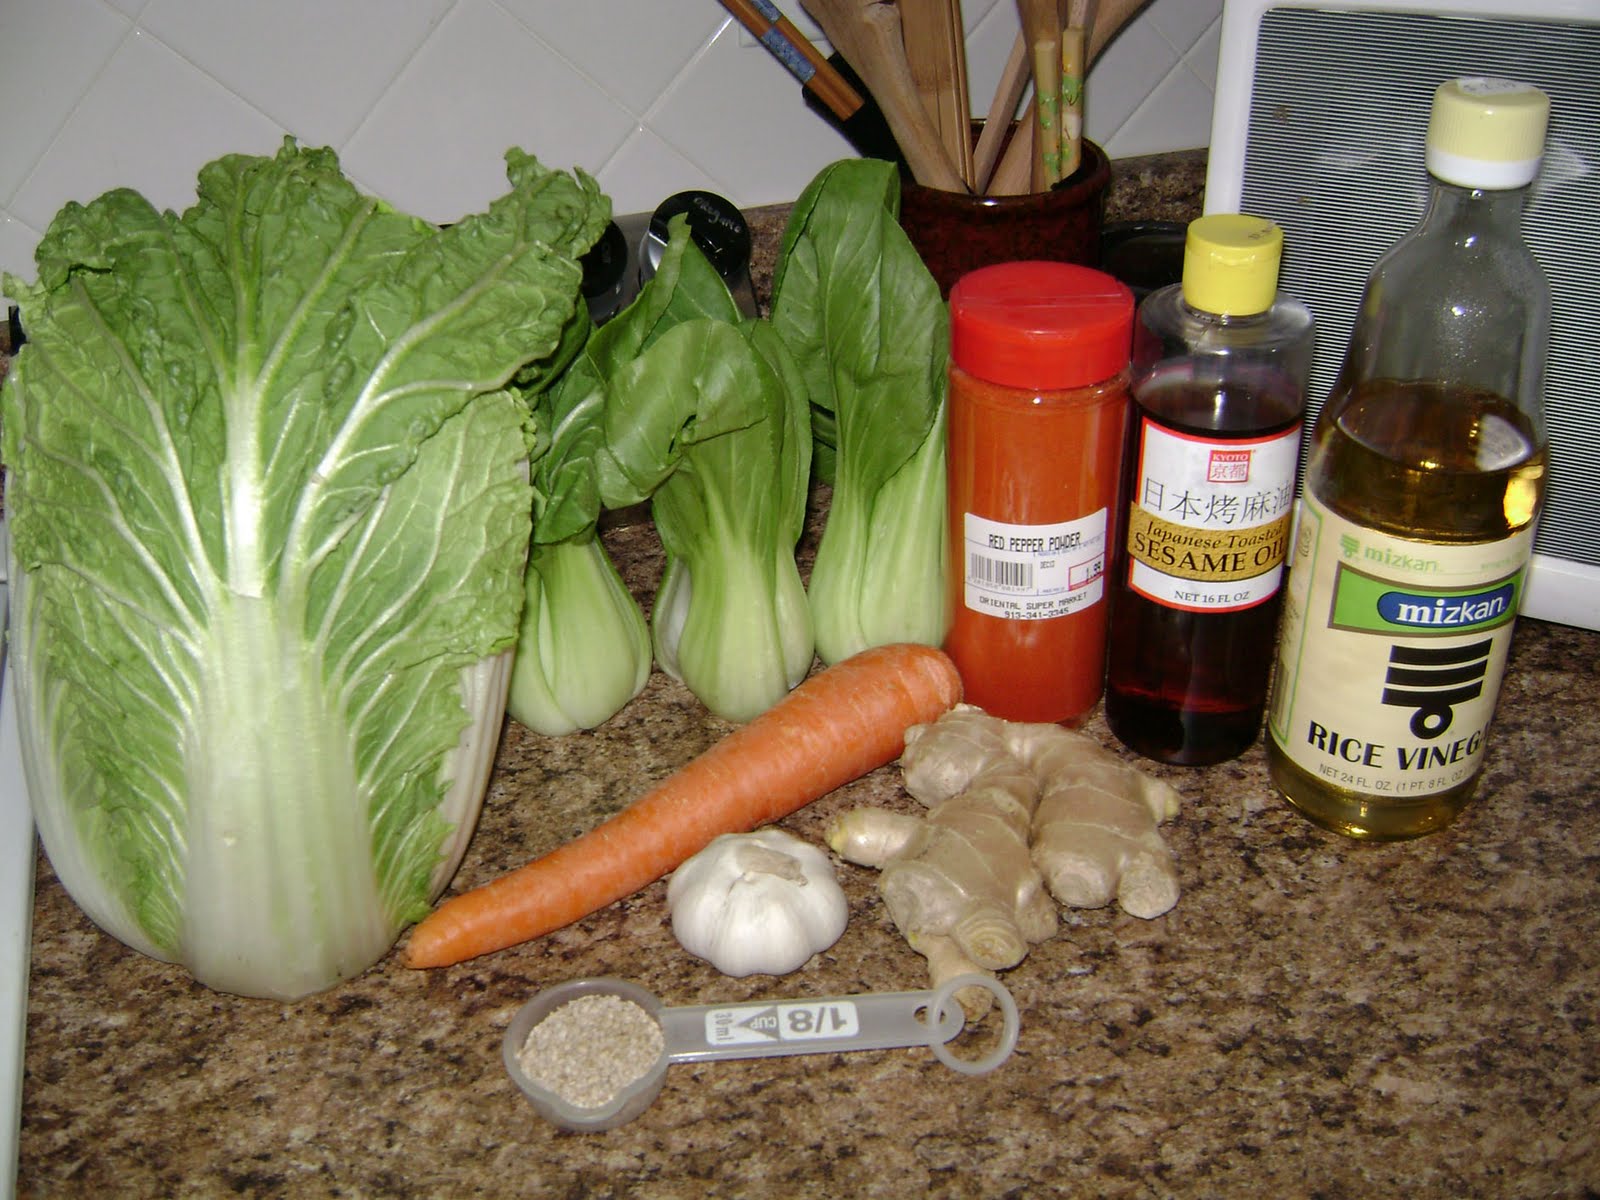
get your ingredients together
prep your cabbage
mix with kimchi paste
tightly pack in a jar for consumption

Tuesday, September 1, 2009

grilled pizza

this was a fun foodie experiment that turned out awesome! i had heard of grilled pizza sometime in the past year, and was determined to make it this summer. i was not disappointed. nice crispy pizza with a wonderful grill flavour - you can't beat it! the timing on the grill is the most difficult part, and i've typed up detailed instructions below.

  • 1 batch of pizza dough
  • 2 tablespoons olive oil
  • yellow squash
  • zucchini
  • green bell peppers
  • red bell peppers
  • marinated artichoke hearts
  • mushrooms
  • black olives
  • banana peppers
  • vegan cheese (optional)
for the pizza sauce (makes two):
  • 2 small cans tomato paste
  • 1/3 cup water
  • onion powder
  • 1-2 cloves garlic, minced
  • 1 tablespoon black pepper
  • pinch of salt
make your sauce and dough first. the sauce is super easy and thick. for the dough... well, i'm not going to lie. i used a package mix, which is usually not my style. however, my kitchen was torn up because i'm getting new counter tops and a new sink, so there wasn't any working room and everything was covered in dust.

while your dough is resting, prep your toppings by chopping them into pizza-sized bits. put them in a vegetable grill tray and cook over medium-high heat for about 4-5 minutes. if you don't have a grill pan, you can create a pouch out of foil and cook them in there, but they won't have as much of the "grilled" flavour.

when your toppings are done cooking, roll out your dough into a circle or square, about 9 inches in diameter and about 1/4 inch thick. if your tough gets too thin, it will tear on the grill. put some flour on a plate and lay your dough on top. coat the top with a thin layer of olive oil - about one tablespoons worth. keep your grill on medium high heat and spray with olive oil or another nonstick spray. in one quick motion, flip your plate over so the crust lands oil-side down. while it's cooking, coat the top side with the other tablespoon of olive oil. check the bottom often for burning and flip as needed. you will likely only need to cook the crust for 1-1½ minutes on either side.


once crust has cooked, remove from grill. spread sauce, toppings and whatever cheese substitute you are using. i opted to forgo the cheese during this test run since i typically have a hard time getting it to melt. once pizzas have been assembled, carefully place them back on the grill on low heat this time. to really accentuate the grill flavor (and melt any cheese you are using), close the lid. continue to cook on low until they start to brown a little on the outside of the crust, approximately 4-5 minutes.

it may seem a little complicated for pizza, but the flavour is so worth it.

Saturday, March 7, 2009

sushi night

sushi. yum. i make sushi a couple times a month, with different ingredient combos each time. however, i can say that my favourite is a mixture of avocado, chopped peanuts, and sriracha sauce, seasoned with dulse, kelp and black sesame seeds. seriously, this sushi is what i would request on my death bed.


another favourite combo is avocado with shiitake mushrooms (you can see them in the back).


lately, i've been making cucumber rolls topped with a spicy mayo. one tablespoon of vegan mayo with as much sriracha as you like. the mayo is thick enough you can make... fun decorations. ;)

Tuesday, December 30, 2008

vegan lasagna

our traditional christmas dinner is lasagna, and for years my mother and i have stood side-by-side in the kitchen on christmas morning assembling our italian dishes. this was the first time i attempted a vegan one, which brought on quite a few changes - from the mozzarella to the ricotta to the parmesan. below is my recipe. also, i tend to like my lasagna really saucy, so just make modifications to the amounts as you prefer.

  • 12 lasagna noodles, cooked
  • 6 cups mom's mushroom pasta sauce**
  • 3 cups spinach
  • 1 large head of broccoli florets, steamed
  • 16 oz. vegan mozzarella, shredded
  • 6-8 tablespoons vegan parmesan
  • 1 batch vegan ricotta (see recipe below)
**if you don't have a favourite sauce, add mushrooms to this recipe

for the ricotta:
  • 12 oz. silken tofu
  • 6 oz. tofutti sour cream
  • 2 teaspoons tahini
  • 2 tablespoons lemon juice
  • 1 teaspoon olive oil
  • 1/4 cup nutritional yeast
  • 5 fresh basil leaves, minced
  • 5-8 baby spinach leaves, minced
  • 2 tablespoons oregano
  • 2 tablespoons parsley
  • salt & pepper to taste
to make the ricotta, blend tofu, sour cream, tahini, lemon juice and olive oil in a food processor. after mixture is creamy (add more oil or lemon juice if necessary), mix the rest of ingredients in by hand. chill until ready to use.

to assemble lasagna:
in a 8x11 glass or ceramic casserole dish, spread about 2 tablespoons of the sauce in the bottom of the dish to prevent noodles from sticking. place 3 noodles across the bottom, then use a spoon to spread about 1/3 of the ricotta evenly. now layer about 1/4 of the sauce in the dish, followed by 1/3 of the spinach and the broccoli. sprinkle a mozzarella layer and a parmesan layer, and then place another set of noodles in the dish. repeat the process, building up the lasagna until you have used up all ingredients. make sure to save enough sauce and mozzarella for the final top of the dish.


a few notes: make sure you buy vegan lasagna noodles (no egg). also, for the mozzarella, i used veganrella this time as i often have a hard time getting fyh vegan gourmet cheeses to melt. veganrella's cheddar cheese is really good, but the mozzarella was just average. i think next time i will try using tofutti mozzarella slices... just a thought.

bake lasagna at 375
°f for about 45 minutes. the top cheese layer should be browning and the sauce should be bubbly. makes 6 large pieces of lasagna.

Monday, December 8, 2008

seitan holiday roast

when i was vegetarian, we would buy the quorn turk'y roast for thanksgiving meals. since that isn't a vegan option, i opted to get my hands wet and create a homemade 'faust' this year. not to mention, it was the first time i ever worked with seitan. i used the very basic ingredients from vegan with a vengeance, but apart from that, it was a miss v creation. not too shabby, i must say.


for the roast:
  • 2 cups vital wheat gluten flour
  • 1/4 cup nutritional yeast
  • 2 tablespoons unbleached flour
  • 2 tablespoons thyme, sage & rosemary mix
  • 1½ cups veggie broth
  • 1/3 cup low sodium soy sauce
  • 2 tablespoons vegan worcestershire sauce
  • 1-2 cloves garlic, minced
  • 1/2 celery stalk, minced
  • 1/8 small onion, minced
for the broth:
  • 2 cups veggie broth
  • 1/3 cup low sodium soy sauce
  • 2 tablespoons worcestershire sauce
  • 1 tablespoon liquid smoke
  • 2 tablespoons thyme, sage & rosemary mix
  • 1/2 celery stalk, minced
  • 1/8 small onion
optional: 4 baby red potatoes

for the roast, mix up the the first four dry ingredients. for the spice mix, just throw in whatever tastes good - i used thyme and sage as they remind me of thanksgiving flavours. mix the rest of the wet ingredients in a separate bowl. for the onion and celery, i used a magic bullet to mince them up as i didn't want large chunks in my roast. slowly combine the wet into the dry ingredients, kneading as you go. knead for at least 2 minutes, and then divide into two small roasts.

put the roasts into a 1.5 quart baking dish. if you want, cut up the baby potatoes to bake with the roasts. mix up the broth ingredients, and pour half into the baking dish with the roasts. bake at 395°f for about 25 minutes. at this point, most of the broth will have evaporated. pour in the second half of the broth and bake for about 20-25 minutes at 340°f. serve warm.

as a side note, i cut my roasts into slices before i baked the second time. this allowed the juices to really get in and marinade the roast. but that's completely optional.

Friday, October 31, 2008

general tao's tofu & veggies

the original recipe is one of vegan folklore on vegweb.com. i made some serious modifications to the recipe, partially because the original calls for so much sugar. i do realize that general tao's sauce is sorta sweet anyway, but i just couldn't bring myself to do it. so, although vegweb was the inspiration, below you will find miss v's own less sweet general tao's tofu & veggies.

  • 1 container of extra firm tofu
  • 3 tablespoons cornstarch
  • 1½ tablespoons sesame or coconut oil
----------
  • 1½ tablespoons ginger (minced)
  • 2 tablespoons garlic (minced)
  • 1 tablespoon chili oil
  • 2 tablespoons rice vinegar
  • 1-1½ tablespoons agave nectar
  • 1 tablespoon chili garlic sauce
  • 1 tablespoon low sodium soy sauce
  • 1 cup vegetable broth
  • 1/4 cup vegan hoisin sauce
  • 1 pkg. (16 oz.) vegetable stir fry medley (or more)

tofu prep:
gently squeeze tofu to drain initial water, and then press to rid it of excess moisture. to press: place two layers of papers towels on a plate, place tofu on towels, and another two layers of paper towels on top. put on another plate, an top with a can of veggies or something for a weight. so basically, you will have plate-towels-tofu-towel-plate-weight. let stand for about 15 minutes. after pressing tofu, cut tofu into 1-inch cubes, and freeze. this gives the tofu a firmer and 'meatier' texture. be sure and thaw for at least 4 or 5 hours prior to making recipe.

after thawing, place tofu on paper towels again to remove some moisture that will drain off. on a large plate, sprinkle 1 tablespoon of cornstarch. put tofu cubes on plate and press into cornstarch. sprinkle the other 2 tablespoon of cornstarch on top, and gently roll tofu around until it's lightly coated. heat sesame or coconut oil in wok on 350 (medium-high heat).
drop tofu in and let brown on each side for about 4 to 5 minutes. after about 20 minutes of browning (if needed), turn the heat up to 400 (high) and crisp up the tofu. pull out and place in bowl. if you follow the tofu prep instructions, you should have nice crispy cubes, *scarily* similar to chicken.


in wok on 350, heat ginger, garlic, chili oil, rice vinegar, agave nectar, chili garlic sauce and soy sauce. after about 30 seconds, put in the vegetable medley (i use asparagus stir fry). then add in about 1 cup of a pepper strips medley. after stir frying veggies for about 5 minutes, add the vegetable broth and hoisin sauce. turn up heat to about 375 and cook for about 7-10 minutes, until sauce has thickened. turn off wok, and immediately drop tofu in and stir up.

top with sesame seeds and serve with rice. i add additional siriacha sauce to my bowl because i like a lot of heat. so although it's not as sweet as traditional general tao's, this is soooo good and to me it tastes exactly like chinese take out. total kitchen time is about an hour, and i'd say it serves about 3-4, depending on the appetites involved.